


Every Photographer should know this one. I believe the joke goes something like this: "So... how many Photographers does it take to screw in a light bulb?" I know you are all holding your breath waiting for the answer. OK, isn't it obvious .......... the answer is..... one, that's right, just one........ and 40 other Photographers to stand behind that guy and say...... "I coulda done that!" Well, that joke has been around for quite a while, and I'm sure that it wasn't created just for Photographers. I am certain that it applies to painters, sculptors, designers, software engineers and just about anyone who sees themselves as an artist of some kind. It's a common feeling to look at someone else's work ( art, design, photographs etc...) and imagine how you might have done it better. The envy you feel when confronted with another artist's exceptional talent and creativity is a powerful motivator; time to step up your game and show the world what you are capable of ! There is, however, a level of talent and innovation that stops you in your tracks and makes you doubt your own worth as a professional. These happy-go-lucky dabblers are almost always amateurs who do not depend on their Art as a sole means of income. They are students, hobbyists, housewives and others who still work a 9 to 5 job. For them, making images is the release from their stress and worries. I believe this says something profound about what can happen to your creativity when you make your avocation a vocation. Maintaining your enthusiasm and artistic standards isn't always easy, especially when you get the assignment to photograph some stiff looking senior executive sitting in a messy office with plain, unadorned white walls. Let's not forget the fluorescent lights that have sucked the color out of his skin and the desk full of crappy banquet awards and old paperwork. Did I mention the comb - over and the Harry Caray Signature over- sized glasses? Shooting in that kind of environment can really tax your creativity and make you wish you had kept your job at the 'Fotomat'. But for the endlessly gifted and visionary Dilettante who answers to no one but his / her self, there are no limits. Break out the pinhole camera or the Eastern European plastic lens 6X7 and create the next cover of Luerzer's Archive. When you can do anything you want, the sky's the limit! For the rest of us there's always those not so exciting and lucrative Pro - Bono jobs to look forward to.
So in my effort to motivate myself and my readers, I will create a new Link List on the right sidebar of this Blog. I will be featuring the Websites of the fantastically talented slackers who still keep a day job, yet consistently outperform us Pros. Keep an eye out for the new links. They should start popping up on the list within a few days.
Coming soon...
Saturday, June 30, 2007
How Many Photographers Does It Take?
Thursday, June 28, 2007
Technology You Haven't Seen!

Could this be the cause of the focus problems with Canon Camera's new EOS 1D Mark III? You be the judge! I know what this is............do you?
What do you think...
Strobist Takes Leave...
David, over at the Strobist Weblog is taking a 1 year leave of absence from his full time gig as a Staff Photographer for the Baltimore Sun. He will be devoting more resources to his very popular Weblog, with the added benefit of having more time to spend with his family. Plans for a lighting course on DVD and more travel projects and seminars are in the works.
you can read more about it on his site
Tuesday, June 26, 2007
After Capture Magazine Subscription Offer!
I had an opportunity to check out a copy of the new AFTERCAPTURE magazine today. I read it cover to cover while I was waiting for a client to arrive at the studio. The publishers are offering some sort of free subscription, available for a limited time. I was extremely impressed by the printing, visuals and content. I would have to say that it might well be the most useful magazine ever published for Digital Photographers. No kidding!
Check them out on their WEBZINE to get a feel for the content.
Software Review...
The good folks at Alien Skin Software are shipping me two of their most popular Photoshop Plug- ins, 'Snap art' and 'BLOWUP'. I will be playing with both of them this weekend and hope to have a review of each plug- in posted early next week. The 'Snap art' plug- in gives your images the look of natural art media, such as oil paint or pen and ink and 'BLOWUP' is Alien Skin's answer to Genuine Fractals for image upressing. I have read good things about both and I'm looking forward to putting them through a few of my very unscientific and subjective tests. Don't expect a 10 page White Paper with charts and mathematical analysis. If your looking for that much detail you've come to the wrong place!
coming soon...
Monday, June 25, 2007
Alien Skin's 'Exposure' Plug-In
In the Sunday June 3rd post I promised you I would write more about Alien Skin Software's 'Exposure' Plug-in for Adobe Photoshop. So here it is...
The folks at Alien Skin Software are local. So they actually came over and spent an afternoon with me in front of my computer listening to me gripe about Adobe Photoshop. In the middle of a book project, I was on month 6 of the editing, processing and manipulation of images to submit to my editor. Anything that would speed up or improve upon the process would be greatly appreciated. Their contribution to ending my misery was the new Adobe Photoshop Plug-in 'Exposure', designed to give your digital images a more traditional film-Like look complete with added grain and luminosity. After the initial testing, Jeff Butterworth; Owner, Founder and Head Braniac at Alien Skin, sent me newly updated versions of the software almost every day. Those nutty guys at AS implemented every change into the software that I asked for and usually within 24 to 48 hours. Software output on its own layer and endless independent point changes on the Curves adjustment were just a few. If I only had that much pull with the folks at Adobe!
The 'Exposure' Plug-in will give you the option of running a particular film look on a new layer above the current layer. You can then finesse the look of the final image by fading back the layer in increments. If you are familiar with Layer Masks you can pull some of the effects thru select areas of an image for endless variety. Velvia, Kodachrome, Old GAF film stocks are but a few of the choices you can run on your images. I find Alien Skin's Exposure plug-in to be indispensable.
EOS-1D Mark III ...Stud or Dud! ....Update
Rob Galbraith has added an update to the article on the Canon EOS 1D Mark III and its autofocus performance problems. The update to the June 19th post deals with more of the readers questions. The article lists several methods for contacting Canon Technical Support and your local Canon Rep.
Link Below:
An analysis of EOS-1D Mark III ... Update for June 21
Sunday, June 24, 2007
My Camera's Better Than Yours !
Now that I have today's first post out of the way and several cups of fine java circulating thru my veins, I can get to the important task of 'Learnin you folks up about this thar Digitle Kamra Witchery. Cause you know I has a sertified degree in Think-Ology from the fedral Govm't.' With credentials like that, who can doubt me!
Canon VS Nikon VS whatever you shoot with:
Spend time on any Camera Forum and you will find the die-hards defending their particular imaging instrument against the slings and arrows of others who shoot with another brand or format. Photographers get emotionally involved with their camera choice and to hell with all the unbelievers. If you can't shoot with a _______ then you shouldn't be shooting at all. So , here I am to add to the fray and upset a few more people.
I used to shoot with Nikon.....exclusively, FE, FM, F3, F4 and F5. The last one ( F5 ) I could never afford to own, but I shot with one on more than one occasion........SweeeeeeT! So I don't have any qualms with Nikon or their optics. I made the transition to Canon Cameras when Nikon fell behind in their AF (auto focus) lens technology. Canon lenses focused faster and much quieter than any of Nikon's Professional lenses and the ergonomic design was, at least to me, a little more pleasing. To get those fine lenses, I had to switch from my beloved Nikon and start all over with a new Canon. I dove into the shallow end and got one of the consumer level cameras to test the waters and fell in love with the ( Elan 2 ) quick response, fast auto focus, and ease of use. This inexpensive little camera completely changed my thinking about Canon Cameras. Because I have at my disposal all the high end cameras and formats from 8X10 to medium format to shoot with at the studio, I don't have to personally own every piece of equipment under the sun to get my work done. When it was time to transition to Digital Capture vs Film, I had no second thoughts about going all in with a Canon Setup. Shooting with the Canon Eos 1ds mark II sealed the deal and there has been no turning back. The quality of the images produced with this camera are stunning, noise free and colorful. Having said all that...... I still shoot 99 % of my work with an 8 Megapixel Canon and Sigma lenses!
Blasphemy!!!
more on this later...
Unicorn Burger Rocks!

Special thanks to Kristen Stewart over at Unicorn Burger who has graciously allowed me to use one of her T-Shirt illustrations for my Coffee Posts. You know I love the visuals and she has got some great images over at her website www.unicornburger.com and her page at deviantArt. Buy lots of stuff and send me some to! Remember, I wear an XL in a cotton Tee!
Maybe I can sweet-talk Kristen into drawing a new version with a Digital Camera in Coffee Man's hand? Did I mention how fantastically gorgeous Kristen is? You can check her out on her website too!
Thursday, June 21, 2007
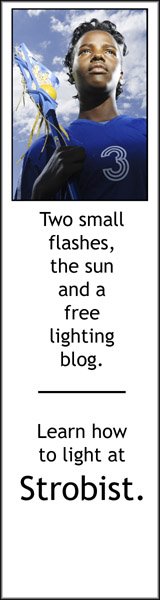
Packing Lite With The Strobist!
Approaching my early 40's has brought about a major change in the way I pack for assignments. I no longer feel the need to pack every light, every stand and light modifier I own. In fact I have learned to do more with less and improve upon the quality of the work at the same time. Send me out the door with a camera, a light bulb and one match and I will come back with good pics! With experience comes the confidence to 'make do' and utilize your surroundings and minimal gear to accomplish any assignment. Not every job will produce images worthy of 'Communication Arts', but that is also the case with most ( average ) assignments, even when you pack the entire studio! Knowing my desire to slim down the gear and give my aching back a rest from equipment overload, a friend of mine turned me onto the STROBIST weblog . It has become an invaluable resource for ideas on packing lite and working smarter, not harder! The link below will take you to his homepage and a wonderful article about the idea of doing more with less!
Note: Eventually this post on his site will move off his home page and be accessible in the June 2007 postings. But for now, this link will get you there.
Link Below:
On Assignment: On Vacation
Wednesday, June 20, 2007
EOS-1D Mark III... Stud or Dud!
Canon Camera has produced some of the best Pro DSLR's ever! I wouldn't want to do my job without one. So why is auto focus on these cameras appear to be getting less reliable? You can follow the link below to an in depth article by Rob Galbraith to read more on the problems with the EOS 1D mark III and autofocus reliability.
An analysis of EOS-1D Mark III autofocus performance
Tuesday, June 19, 2007
Editing The Raw Files...Part 4
Continuing from the 'Editing The Raw Files' Part 3 post on Sunday June 17th :
11) Once you have completed your 1st edit of the images ( still in Raw Format ) and tagged the keepers, it's time to save the tagged files to your next Desktop Folder. Example: ABCorp_RawEdits. You are now ready to open the images in your Processing Software and see them as they really are, before any adjustments in color or exposure. Once you get familiar with your Raw Processing Software you won't have to keep referring to the Histogram display to judge proper exposure. It goes without saying that to judge color and exposure, you will have to have a high end color monitor that is color corrected with the proper software and screen sensor. I recommend using a LCD monitor for the best color accuracy, with the added benefit of Color Profiles that stay accurate far longer than CRT monitor technology.
Most Raw Conversion Software will allow you to click balance (color correct) your images by isolating an area of medium White or Grey. This will get you in the ballpark if you think the color of the imported images is a little off. Remember that accurate color is not always the best color! You can very easily take the Zing out of an image taken at sunset if you remove a warm color cast in favor of absolute 5000 degree Kelvin. Use your best judgement and apply the same color / exposure adjustment to all the images from the same setup.
More to come...
Portrait Retouch Challenge...
One of the Posters ( Mr. Eamon Hickey ) over at dpreview has posted a simple portrait shot of his girlfriend ( Simple head and shoulders ) and asked readers to try out their retouching skills on the image. Looks like a lot of fun! I may have to give it a whirl. Anyone interested can download the tiff Portrait image and work their mojo, then upload to the dpreview site and let others comment! I'm not sure how long the challenge will last, so you better check it out soon. Join the site ( free ) if you want to participate. You can follow the dpreview link above to the download page.
UPDATE: Our first submission by Dr. Pimento
Monday, June 18, 2007
New KODAK Image Sensor...
KODAK has designed a new image sensor technology that will help digital cameras see light in a similar fashion to the human eye. They have included a clear ( Panchromatic ) pixel to the sensor array with added sensitivity to low light levels. Software Algorithms process the extra data, effectively giving the sensor 2X - 4X times more sensitivity to light. You can follow the link above to the Kodak Website to read more.
Can't Get Enough Of Those Beans!
Coffee quote of the day:
"If this is coffee, please bring me some tea; but if this is tea, please bring me some coffee."
America's 16th President, Abraham Lincoln
No such problem with the brew I'm drinkin. It's mighty tasty and good to the last drop! My part- time, unpaid editor sent me home with some ' Bean Martin' Whole Bean Java from 'Larry's Beans' in Downtown Raleigh. It's a smooth, bold blend of Javalicious Goodness! Just what I needed to get my posts rolling.
Sunday, June 17, 2007
Editing The Raw Files...Part 3
Continuing from the 'Editing The Raw Files' Part 2 post on Sunday June 3rd :
10) Having backed up and organized your newly downloaded Raw Files, you are now ready for the fun part (sort of) of the editing process. Before you can start, you must have an editing software suitable for displaying 'Raw Format' images that is color accurate and renders the images quickly enough to get the job done in a short time. Adobe's 'Bridge Software' or 'Raw Converter' is a poor substitute for a real editing program. The images will certainly be color correct ( if the auto settings aren't engaged! ) but rendering each image quickly and at 'Full Screen' isn't what the program was designed for. While you are struggling to disengage auto this , that and the other, I am halfway through the editing process. In short. All that is needed in an good editing software is a fast rendering, somewhat color accurate display of the files, tagging options and filmstrip scroll through. Camera Bit's 'Photo Mechanic' is hands down the fastest editing software available. It is used by many news organizations Worldwide in their daily effort to sort through content coming in from photographers around the Globe. Another great software for the Canon Shooter is the deceptively simple 'Zoom Browser Ex', which comes free with Canon Cameras. Most free software sucks, but not this one. If you try and use it to color and exposure correct your Raw files, it may not seem that fantastic. But for raw (Pun intended) speed there's nothing that can touch it. Your pics will fly across the screen as fast as you can hit the left or right arrow button. No waiting for the software to re-adjust color or exposure, just full screen ( or smaller if you like) images ready to be tagged. All it takes is a keystroke to mark the keepers and move on to the next image. My personal preference is to mark only the keepers and not get too bogged down with some ridiculous rating system! They are either ready for prime time or not.
Continued...
PinoBlogero.Com... A Great Site!
I am a Photographer, not a Writer . So I must rely on others for the occasional push in the right direction with the design and utility of my Blog. Being a visual person, my priorities when designing this site are more focused on Color, Bling and Visuals. I have to edit , re-edit my writing to present my ideas in a relevant manner and not forget to run Spellcheck on every post. Somehow after 42 years I have forgotten how to spell and punctuate the simplest words. Writing daily has made this abundantly clear. I hope I am doing better this week than last! So, in my quest to do things the right way, I seek out others who have mastered their medium and try and learn from their example. This week I stumbled upon Karlo Lucidines Blog ' PinoyBlogero.com' which is a wonderful How to for Blogging and Writing. He is also a Master Illustrator / Artist with a wonderful color rich style. His offer on his website to design customized feed Labels ( Illus. buttons for links ) is not one to pass up. He only requests a review of his site for his hard work. Its obvious from reading his blog that he is a real cool guy and probably a top student. I can't wait to see the button he designs for me!
Friday, June 15, 2007
Saying No to Pro Bono...
At some point in your career as a Professional Photographer, you will be asked by some Art Director, PR Firm, Charity etc... to shoot Pro- Bono ( Freebie ) for their latest sad-sack cause. "Run for Glaucoma", "Restless Leg Syndrome Foundation", "Feed the Seals!", "Citizens for Carbon Offsets" or some such do-gooder cause. Let me help you with the proper response to such commonly occurring enquiries from the well meaning advertising braniacs who call you to get your free help on their latest project.
Response 1) No
Response 2) Have I got the guy for you! ( Give them another Photographer's name, preferably a close friend. This way he can call you up and curse you later.)
Response 3) Are you ( Art Director, Charity Pimp ) being paid for your services? How about the Printing Company responsible for the Ad, Poster et cetera, are they being paid for their time?
Response 4) Not this week, I'm still a little shaken up by Al Gore's Movie "An Inconvenient Truth" !
The last one will score you points with the caring set and let them know that your Globally Conscious :)
PS. No one ever asks a plumber to come and root drains for "Jerry's kids". I guess if every one took up pipe fitting as a national hobby that people would be asking plumbers to do their jobs for free! You Know........for the exposure...."Think of all the work it will bring in!"
Yeah........more Pro Bono work!
Sunday, June 3, 2007
Editing The Raw Files...Part 2
Continuing from the 'Editing The Raw Files' post on Monday, May 28th :
9) With the DCIM folders safely backed up on multiple drives or disks ( DVD, CD etc...), its time to create the 'Editing Folders' that will be the back-bone of our 'Workflow'. To keep things organized, their must be a designated place for each edited or processed file that can be quickly accessed from your editing software and in the final stage from Adobe Photoshop. I find it easiest to create 1- 4 folders on my Computer's Desktop to hold the edited selects, before and after the software ( Conversion to Tiff ) processing. Each folder can be given a name that clearly explains what is inside. Example: ABCorp_RawEdits, ABCorp_Tif, ABCorp_WIP ( Work in progress ) and ABCorp _Final. The final folder is obviously the 8 or 16 bit PSD's or Tiff files after all color correction and manipulation. If you do anything freaky to them after that, create a new folder off the desktop for them and label it appropriately. When the job is edited , processed and delivered to the client you can move the folders off the desktop to a final 'Work Folder' with just the clients name and date.
Continued ...
APS-C Snobbery!
Some of you may be wondering why my focus seems to be exclusively on APS-C and Full frame Digital SLRs versus the medium format Hasselblads, Mamiyas and Large Format Digital Options that are currently available. The reasoning behind this is simple and partly selfish on my part. I believe that almost all my advice will easily translate to shooters who use large format capture devices or medium format digital cameras. Also, if your shooting with a Hasselblad H1, you probably have enough jack to pay someone to bring you up to speed on the whole digital thing! For the rest of us with meager budgets, the quality, clarity and file size offered by the new Canons and Nikon DSLRs is far beyond that which is needed to produce our work! Most of my images are reproduced at their largest as full page 'Magazine Covers' or the occasional 'Double Truck'. When a larger file size is required, upressing with 'Adobe Photoshop CS2' or 'Genuine Fractals' is an easy answer. 'Alien Skin Software ' has an excellent Photoshop Plug In called 'Blow Up' that will give you a more film-like-look when upressing. The Imaging Software Gurus at 'Alien Skin' also produce several of the most useful image enhancement software programs available. I currently use a little magic from their product 'Exposure' on almost every job I shoot.
More about 'Alien Skin' in a future post!


0 comments:
* CLICK HERE TO ADD YOUR COMMENT